replacing print cartridges
Before buying replacement print cartridges, verify the correct
part numbers
.
The printer can operate with only one print cartridge installed. For more information click
here
.
To replace a print cartridge:
1. Load a stack of plain white paper in the In tray.
2. Press the
Power
button to turn on the printer.
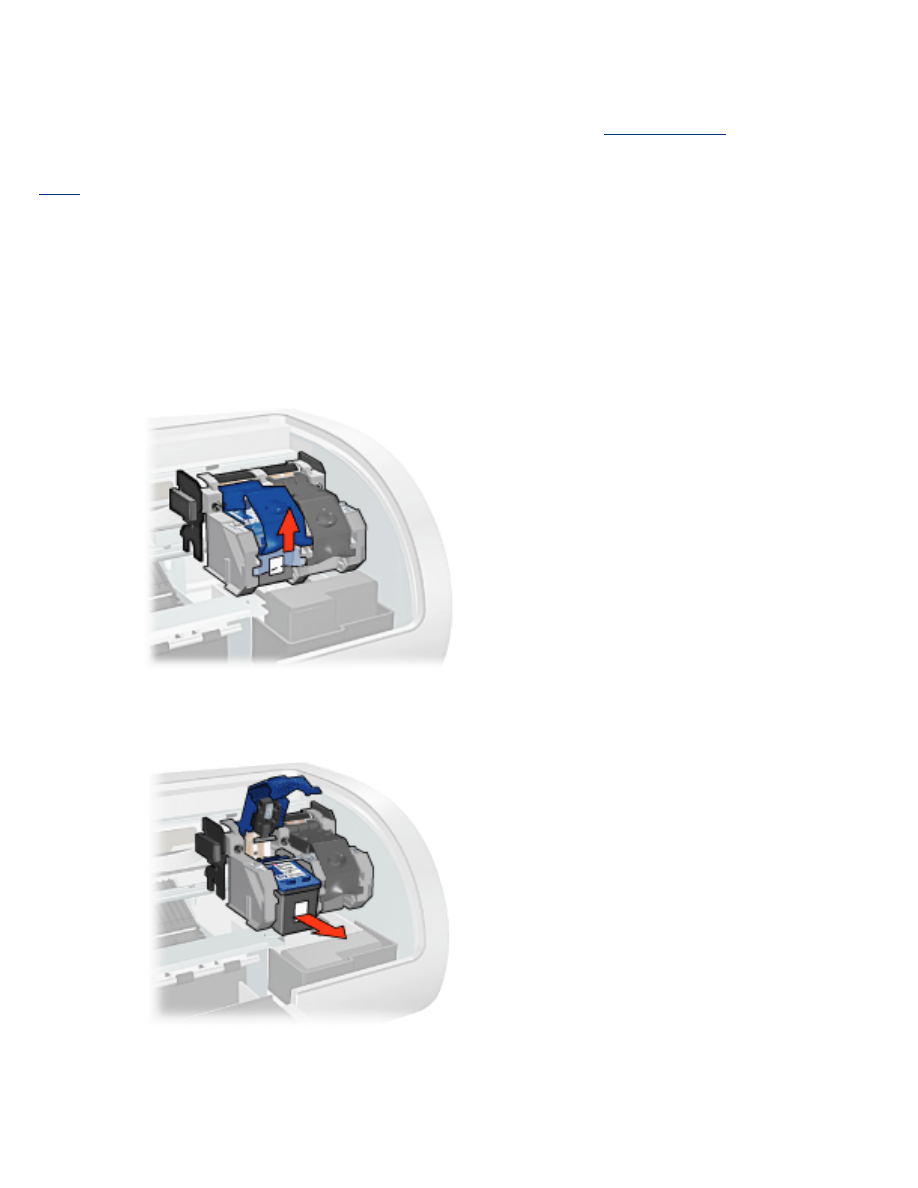
3. Open the printer cover.
4. Lift the print cartridge latch to the open position.
5. Slide the print cartridge out of the print cartridge cradle.
6. Remove the replacement print cartridge from its packaging and carefully remove the
plastic tape.
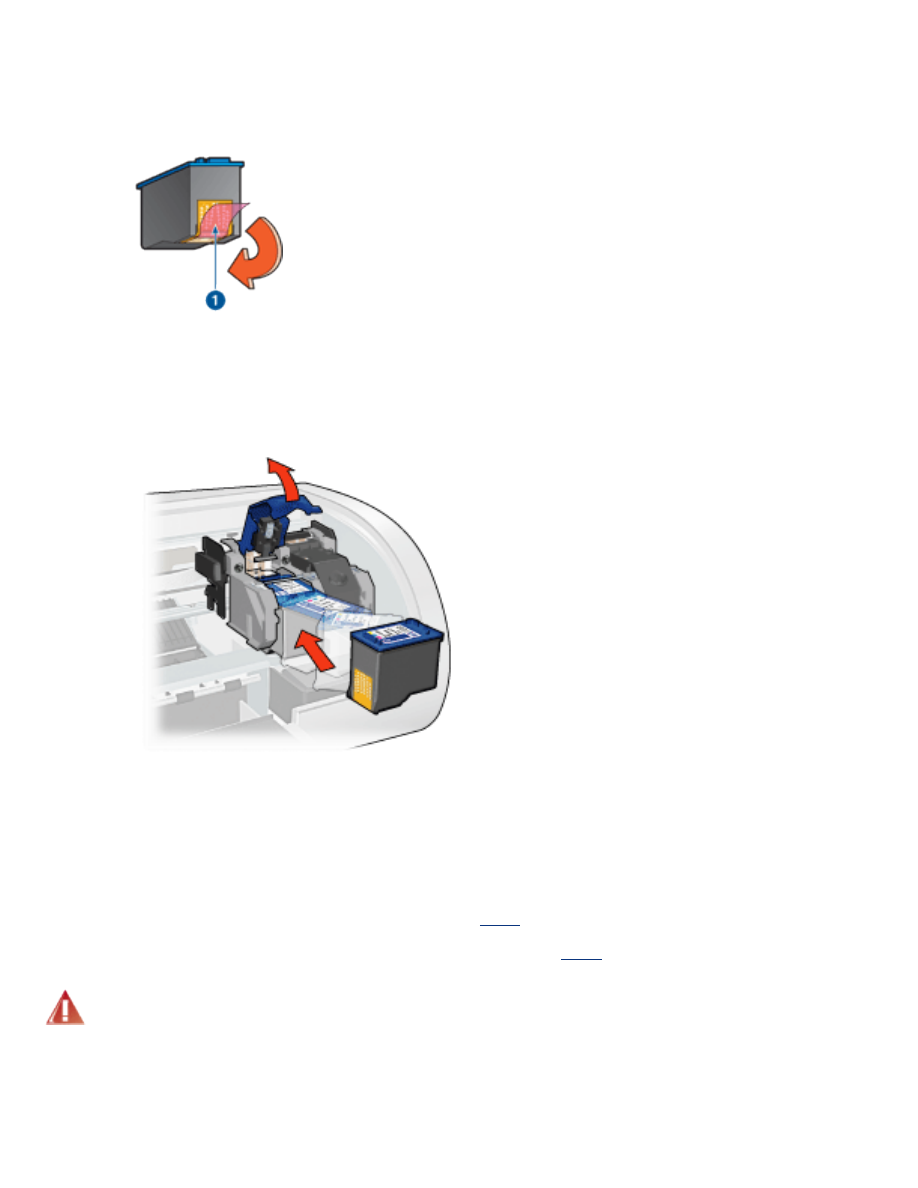
Caution!
Do not touch the print cartridge ink nozzles or copper
contacts. Touching these parts will result in clogs, ink failure, and bad
electrical connections. Do not remove the copper strips. They are
required electrical contacts.
1. remove plastic tape
7. Hold the print cartridge so that the copper strip is on the bottom and facing toward
the printer, then slide the print cartridge into the cradle as shown.
8. Push down on the print cartridge latch until it snaps closed.
9. Close the top cover.
The printer automatically prints a calibration page.
For information on storing print cartridges, click
here
.
For information on recycling empty print cartridges, click
here
.
Warning!
Keep both new and used print cartridges out of the reach of
children.