borderless printing
Borderless printing lets you print to edges of certain paper types and a range of standard
paper sizes from L size (89 x 127 mm) to Letter (8.5 x 11 in) and A4 (210 x 297 mm). The
printer can also print on 4 x 6 inch photo paper with a tear-off tab.
guidelines
●
Do not print borderless documents in
ink-backup mode
. Always have two print
cartridges installed in the printer.
●
Open the file in a software application and assign the image size. Ensure that the
size corresponds to the paper size on which you want to print the image.
printing
Follow these steps to print a borderless document:
1. Open the file you want to print.
2. Open the
Printer Properties
dialog box.
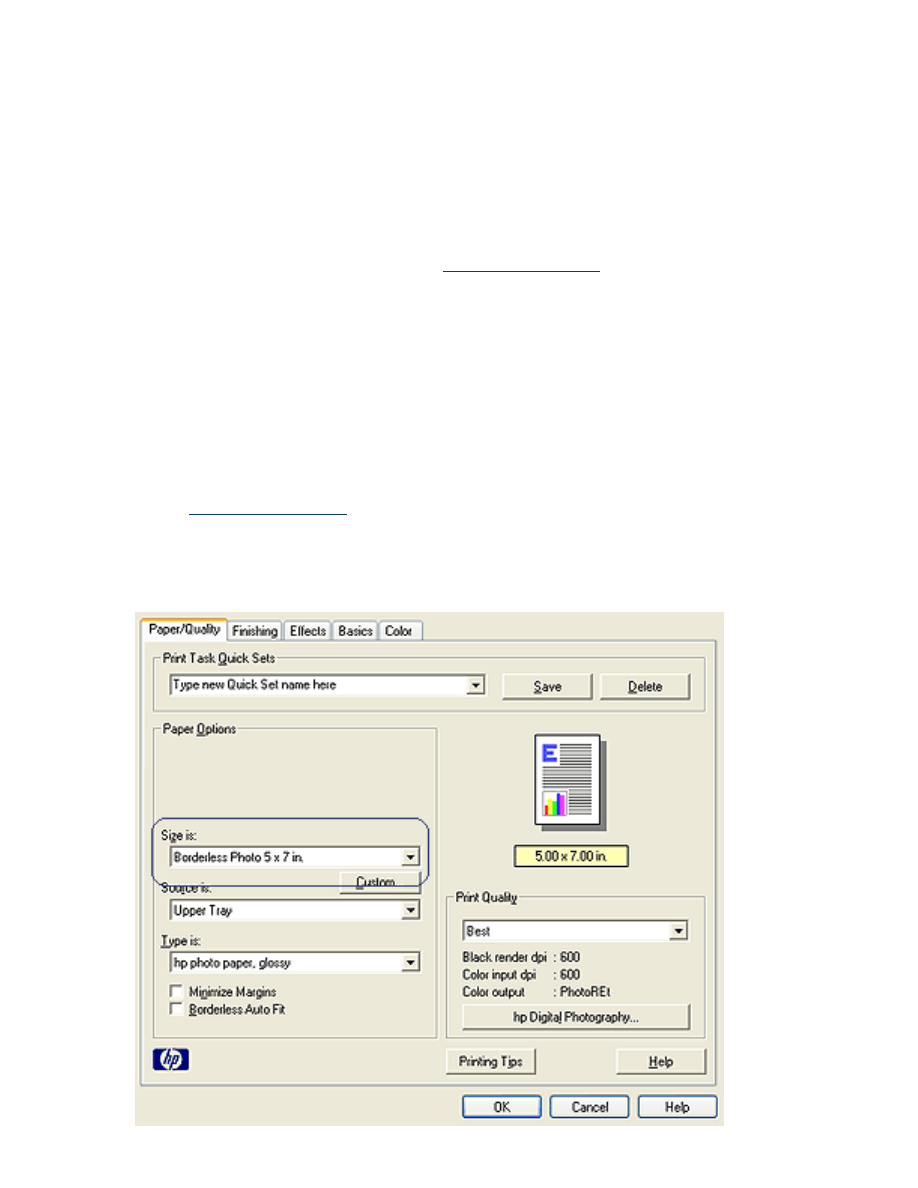
3. Select one of the borderless paper sizes from the
Size is
drop-down list. Verify that
the paper size you select matches the size of the paper loaded in the In tray.
4. Select the appropriate paper type in the
Type is
drop-down list. Do not select
Automatic
.
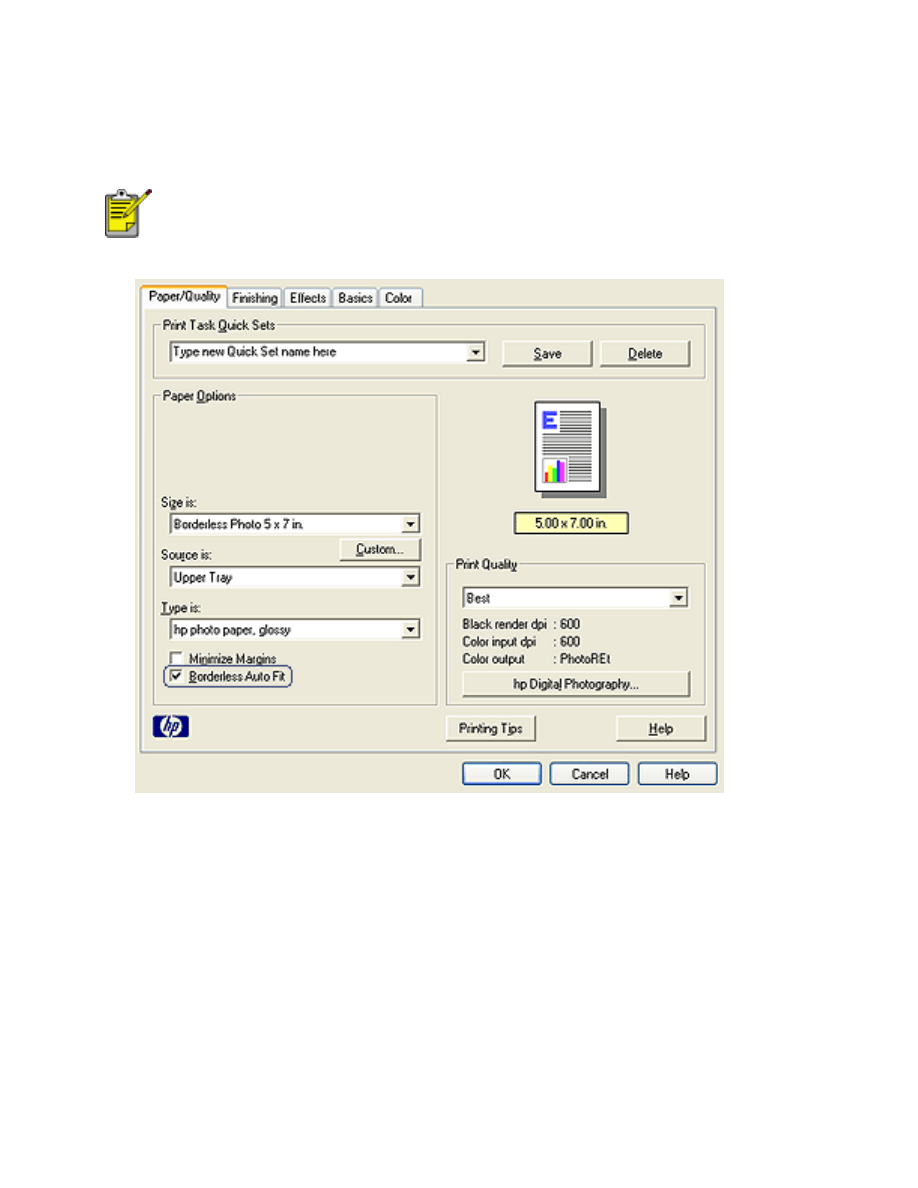
5. Click the
Borderless Auto Fit
checkbox to automatically resize the image to print
without a border.
The
Borderless Auto Fit
option is only available for photo paper
types.
6. Select any other desired print settings, then click
OK
.
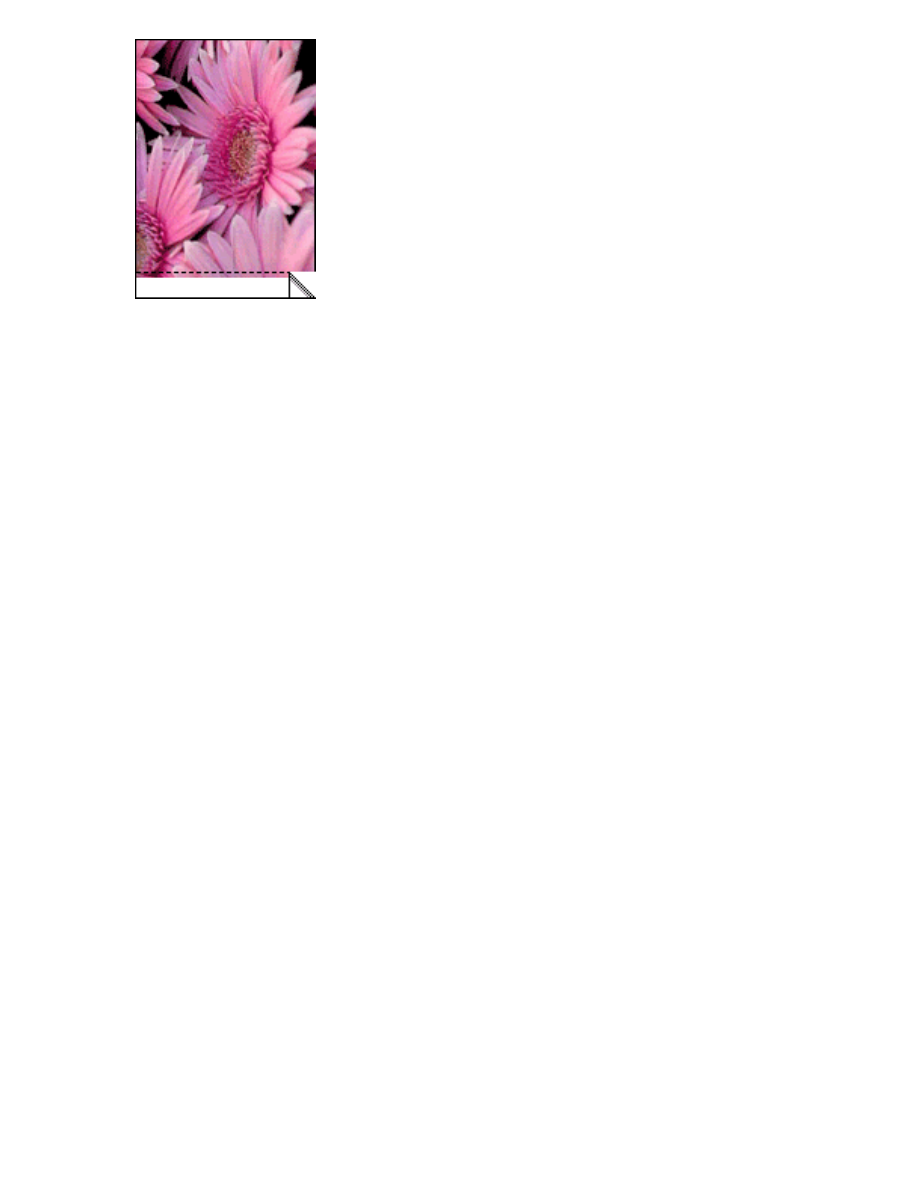
If you printed on photo paper with a tear-off tab, remove the tab to make the
document completely borderless.