250-sheet plain paper tray accessory
The 250-sheet Plain Paper Tray Accessory expands the paper capacity of your printer to
400 sheets. It is useful for high-volume printing and for occasions when you want to use
the In tray for special media such as letterhead paper, but still have plain paper readily
available.
If the 250-Sheet Plain Paper Tray Accessory is not included with your printer, it may be
purchased
separately from an authorized HP dealer.
The 250-Sheet Plain Paper Tray Accessory is not available in all countries/
regions.
For information about the 250-Sheet Plain Paper Tray Accessory, select one of the topics
below:
●
installing the 250-sheet plain paper tray accessory
●
accessory description
●
setting the paper size
●
loading the lower tray
installing the 250-sheet plain paper tray accessory
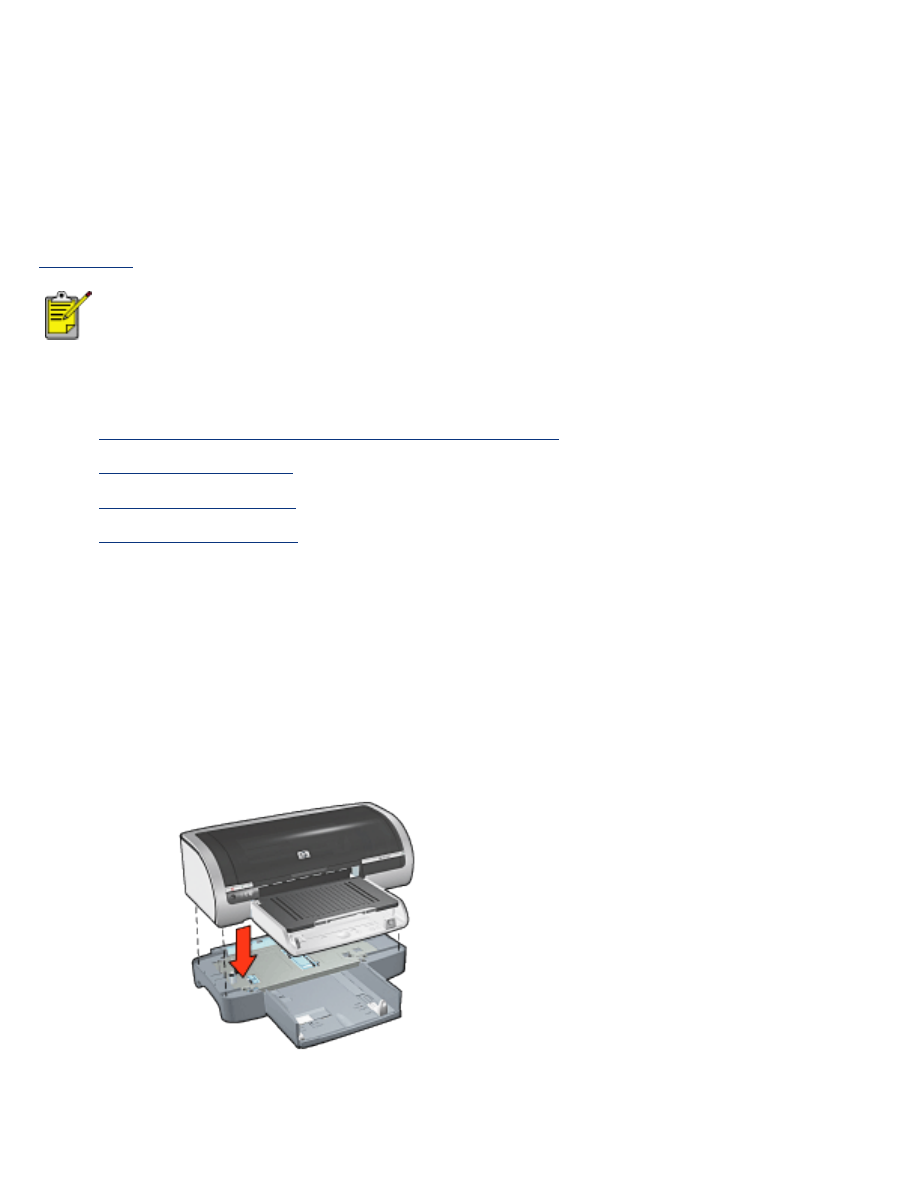
Follow these steps to install the 250-Sheet Plain Paper Tray Accessory:
1. Turn off the printer.
2. Select a location for the printer and place the 250-Sheet Plain Paper Tray Accessory
in this location.
3. Carefully lift the printer and orient it above the paper tray.
4. Gently place the printer on top of the paper tray.
using the 250-sheet plain paper tray accessory
accessory description
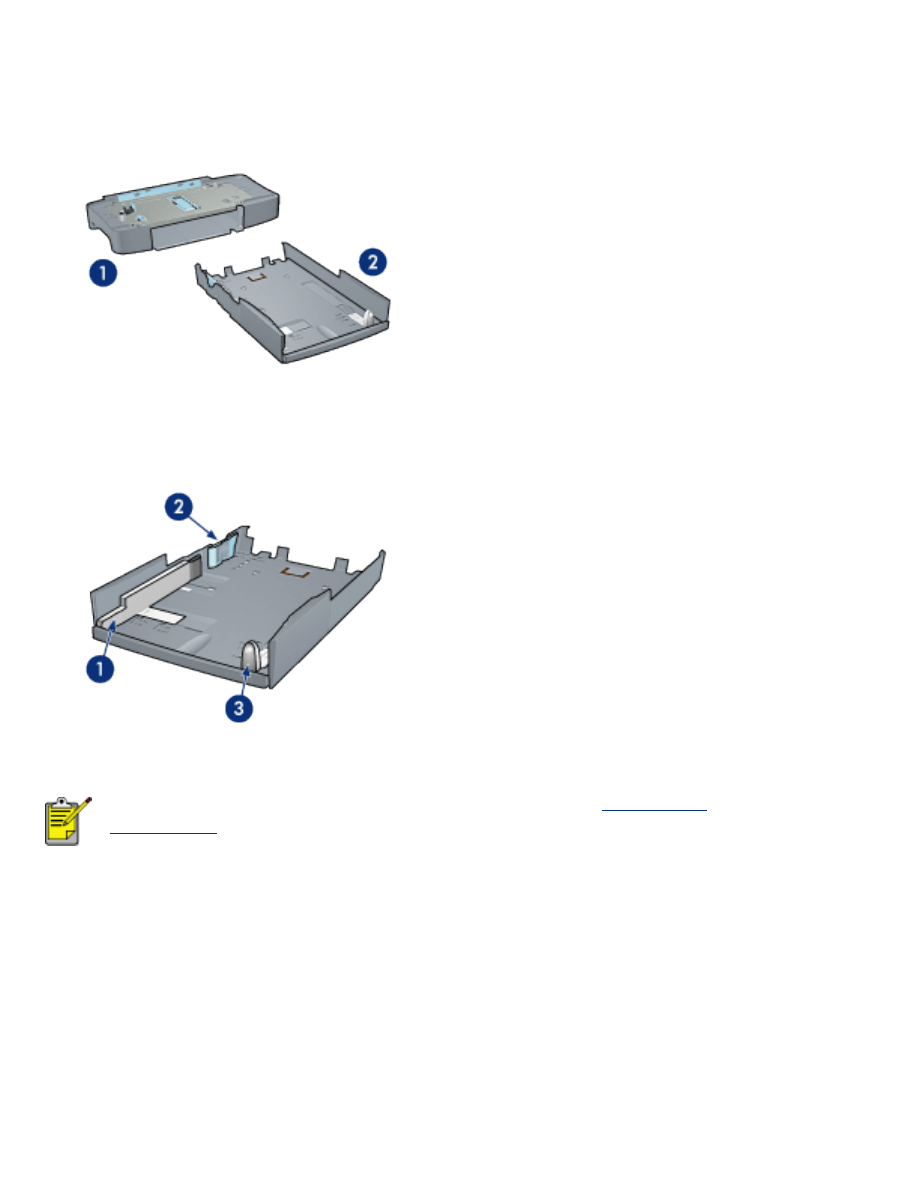
The 250-Sheet Plain Paper Tray Accessory has two parts.
1. base 2. lower tray
The lower tray has three size adjusters.
1. paper width guide 2. paper width fence 3. paper length guide
When changing the paper size in the paper tray, you must
set all three
paper guides
.
setting the paper size
When changing the paper size in the paper tray, all three paper guides must be set to the
correct setting.
Follow these steps to set the paper size:
1. Remove the lower tray from the base.
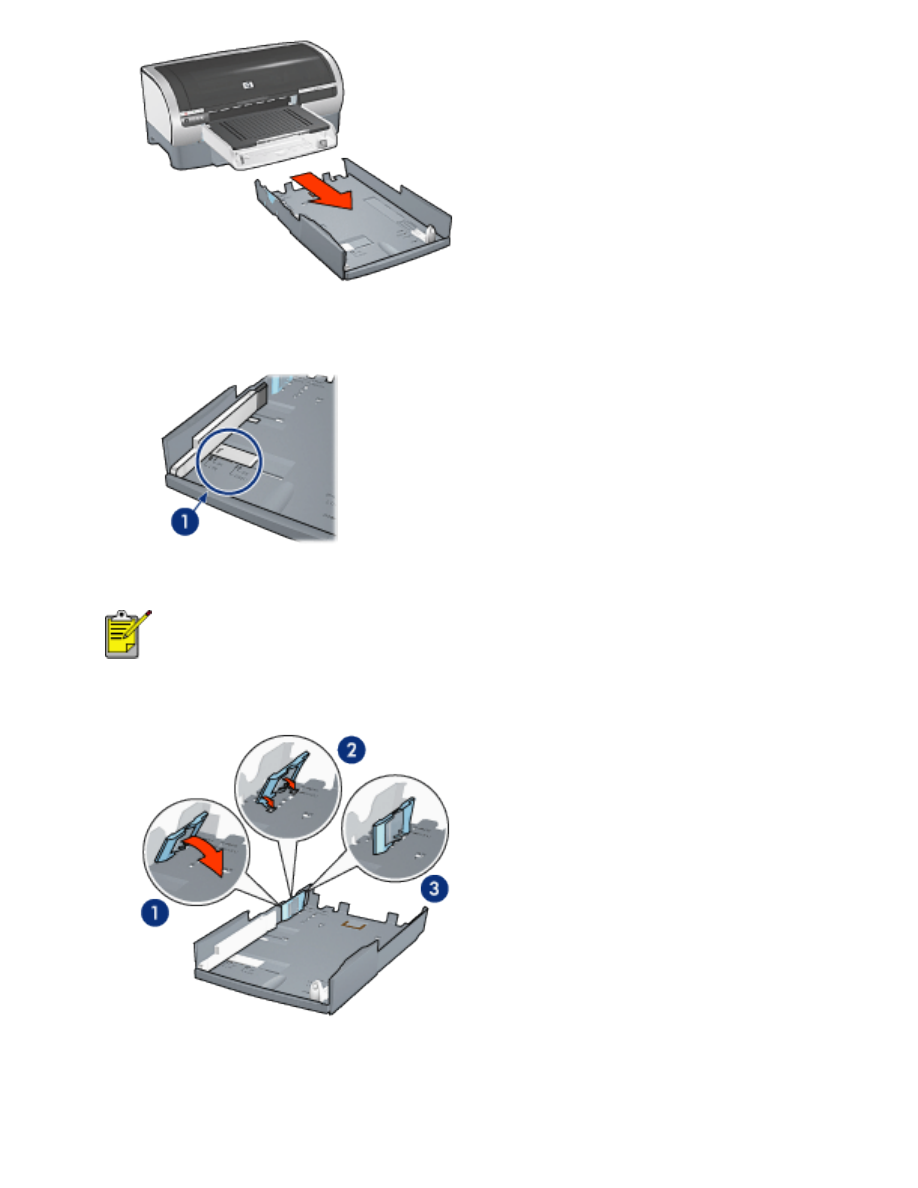
2. Slide the paper width guide until the arrow is even with the correct setting.
1. align the arrows
To print on legal-sized paper, set the paper width guide to
LTR
.
3. Set the paper width fence by carefully inserting it into the appropriate sized slot.
1. tilt the fence forward. 2. insert the fence into the appropriate slots 3. tilt the fence
back until it locks into place
To print on legal-sized paper, set the paper width fence to
LTR
.
4. Set the paper length guide by pulling it until the arrow lines up with the paper size.
1. align the arrows
To print on legal-sized paper, pull the paper length guide all the
way out.
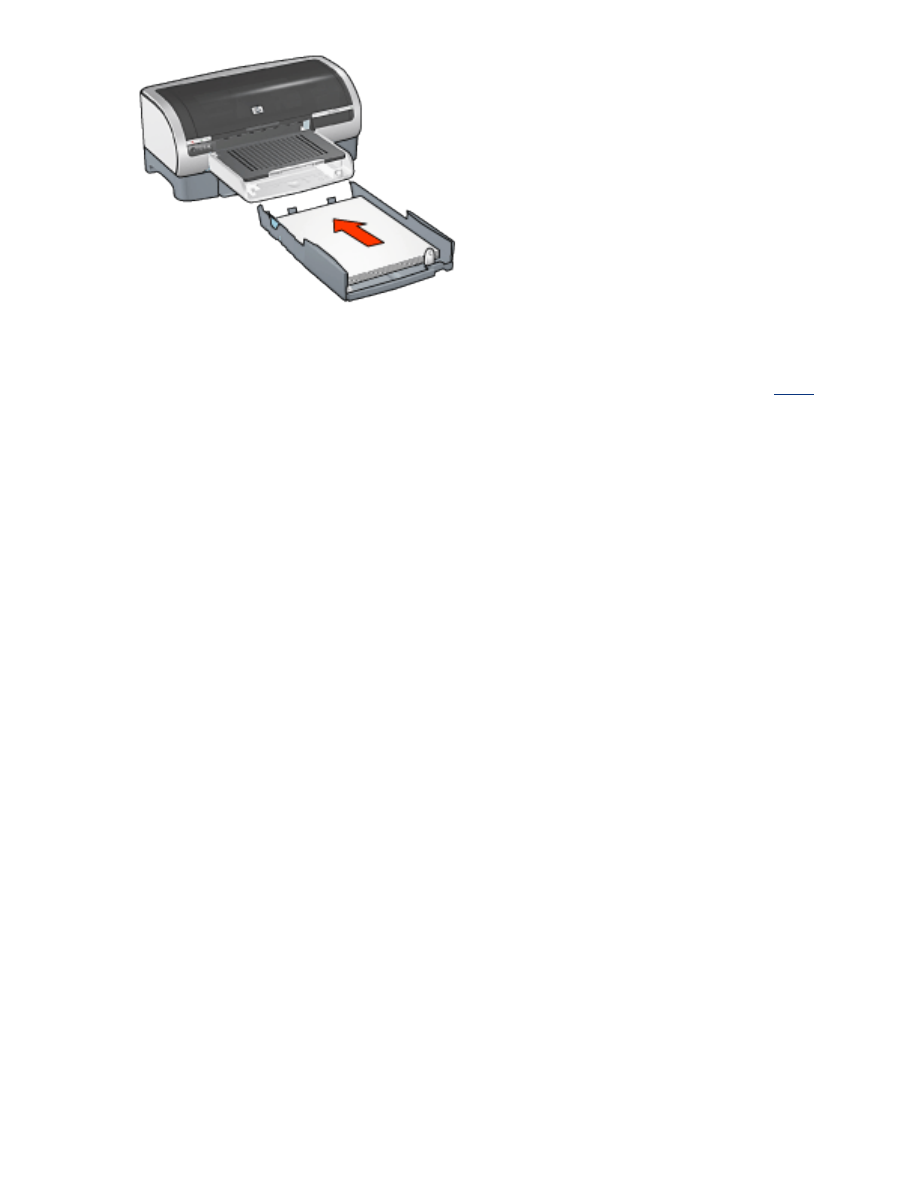
loading the lower tray
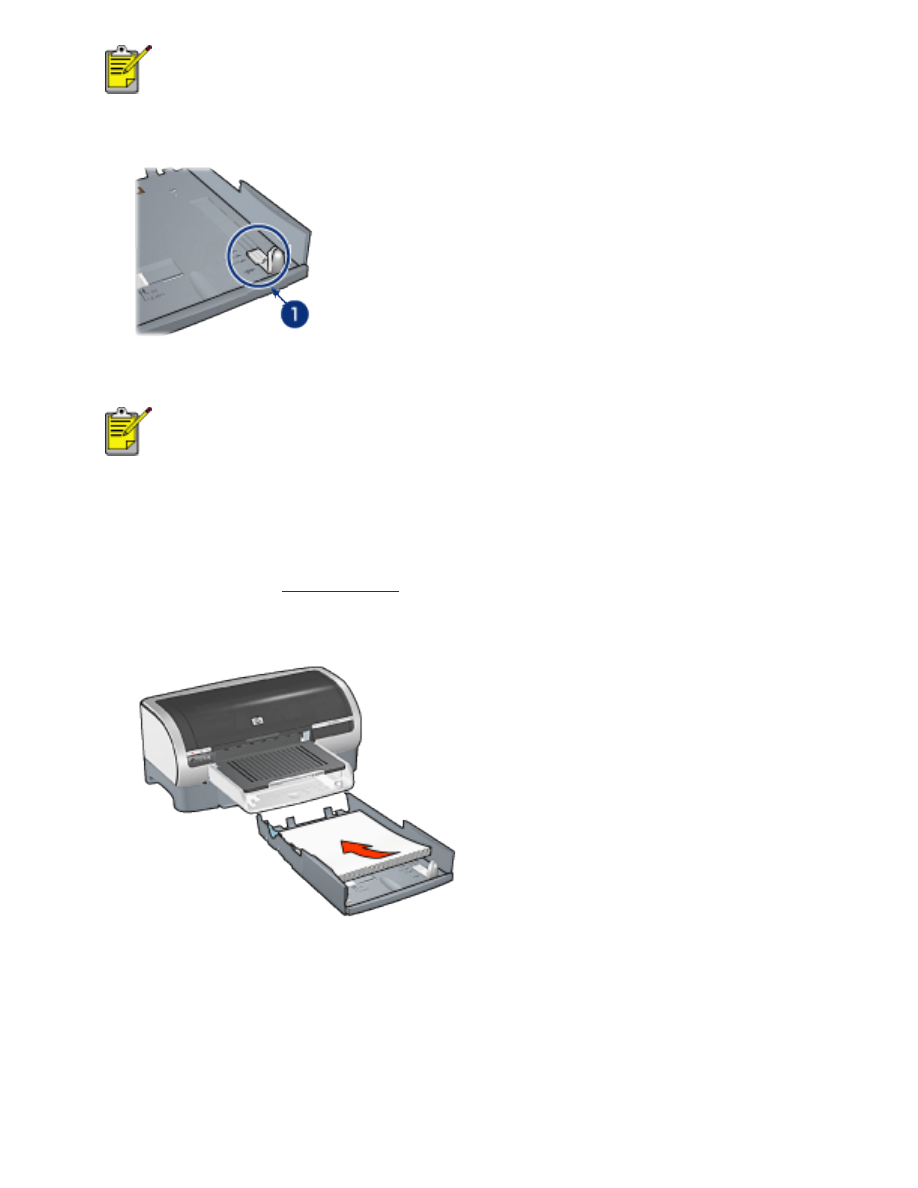
Follow these steps to load paper:
1. Verify that all three
paper guides
are set to the correct setting.
2. Insert the paper into the lower tray.
3. Insert the lower tray in the base until it locks into place.
printing instructions
For instructions on printing with the 250-Sheet Plain Paper Tray Accessory, click
here
.
printer assistant home
back